
Introduction: Why a batch editing workflow matters for your business
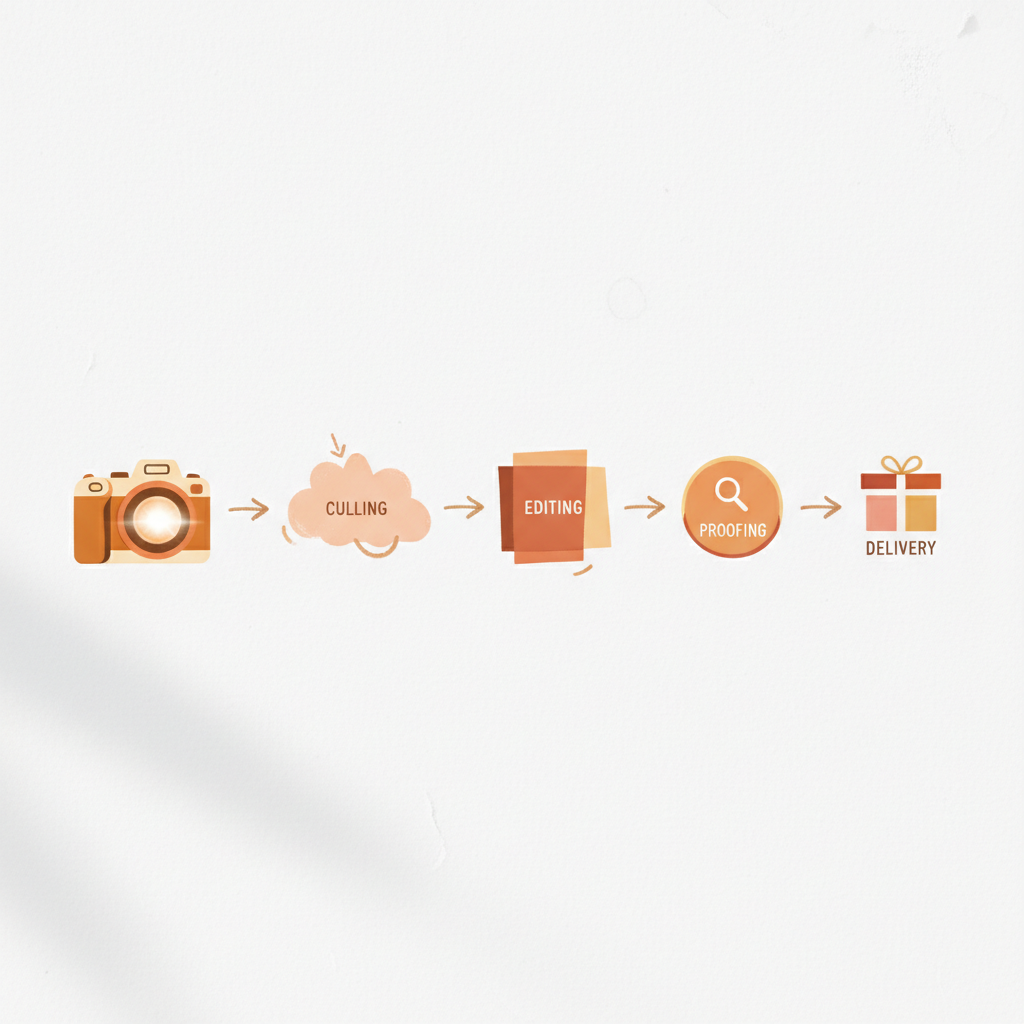
You don’t have to edit every image one-by-one to deliver premium, consistent galleries. A repeatable batch editing workflow turns repetitive tasks into predictable outputs so you can scale without sacrificing quality. The right system speeds delivery, reduces decision fatigue, and makes your business more sellable.

The fastest way to grow bookings is to make great work predictable—standardize culling, apply trusted presets, and route client feedback through a single proofing tool.
What this guide will teach you
You’ll learn how to build a proofing workflow that moves images from cull to client-ready with minimal friction. Follow practical steps and tools to automate routine work while keeping creative control.
- Establish a fast culling and batch editing routine.
- Create reliable batch color grading using presets and global adjustments.
- Integrate photo proofing software for client selections and comments.
- Automate delivery and the gallery delivery process so galleries ship on time.
Who should use this workflow (wedding, portrait, family photographers)
You should use this if you shoot multiple sessions per week and need consistent turnaround. Wedding photographers benefit most from predictable album-ready galleries; portrait and family photographers gain repeatable session templates.
- High-volume wedding shooters who need fast album assembly.
- Portrait studios wanting uniform skin tones across sessions.
- Family photographers delivering galleries to clients who expect quick proofing and easy feedback.
What success looks like: speed, consistency, happier clients
Success shows up as measurable time savings and happier clients. You’ll cut editing hours, deliver galleries quicker, and receive clearer client gallery feedback.
- Faster turnaround: reduce post-production time by 30–60% with batch processes.
- Reliable output: maintain consistency across sessions using presets and recipes.
- Better client experience: streamlined proofing and feedback increases referrals and repeat bookings.
Adopt a repeatable proofing workflow, and you’ll reclaim hours to shoot more, market more, and enjoy the creative work you love.
Fundamentals: Proofing vs. batch editing — definitions and goals
Definitions: proofing, batch editing, culling, tethering
Clear, shared definitions let you map tasks to software and people.
- proofing — the client-facing review stage where selections, comments, and approvals happen.
- batch editing — the technical process of applying consistent adjustments to groups of images to save time.
- culling — the selection step that reduces hundreds of frames to the ones you’ll edit and deliver.
- tethering — shooting while connected to a computer so images appear instantly for review or adjustments.
Treat proofing as the conversation with the client and batch edits as the production line; when those two processes have clear boundaries you cut turnaround and revisions dramatically.
Primary goals: reduce turnaround, standardize quality, minimize revisions
Speed matters: aim to shorten your client delivery window without sacrificing quality. Design your batch editing workflow so the heavy lifting — exposure fixes, color balances, and sharpness — happens in predictable, repeatable batches.
Consistency matters: use presets, synced adjustments, and LUTs to ensure a reliable look across galleries and shoots. Consistent output reduces back-and-forth with clients and keeps your brand strong.
Revision control matters: give clients curated galleries for clear, trackable feedback and limit full-image edits to approved selects. Fewer subjective change requests means less rework and more billable time.
Essential terminology and file-types to know
Know which files move at each stage to avoid surprises.
- RAW — highest-quality capture for editing latitude; use for master edits.
- JPEG — compressed delivery file for client galleries and quick previews.
- TIFF/PSD — high-quality exports for retouching or print.
- LUT/preset — repeatable color adjustments applied during batch processing.
- Proxy — low-res files for fast culling or client galleries to protect originals.
Use a proofing platform that respects these file roles so your proofing workflow and batch editing stay synchronized and efficient.
Step-by-step batch editing workflow you can use today
Ingest and backup: fast import and folder structure
Start by ingesting to a fast internal SSD and mirror to a backup drive or cloud immediately. Create a clear folder structure: YYYY_MM_DD_Client_Event > RAW > Selects > Edits > Exports. Automate metadata and keyword templates on import to speed later searching.
- Import to local SSD.
- Auto-backup to external drive/cloud.
- Apply metadata and keywords.
Efficient culling: rating, flags, and smart filters
Cull quickly using a two-pass system: flag all keepers in pass one, rate top picks in pass two. Use keyboard shortcuts, compare view, and smart filters to separate blurred or duplicate frames—this is where culling and batch editing save the most time.
Cull ruthlessly: remove 50–70% of frames in the first pass so your edits focus only on the best images.
Apply smart collections or filters (camera, lens, ISO) to target problem shots for individual attention.
Preset strategy: global vs selective adjustments
Start with a presets-based global fix: exposure, white balance, and lens corrections on the whole set. Follow with selective tweaks—local brushes, linear gradients, or masking for faces and skies—to keep edits consistent without over-processing.
Use a simple hierarchy: Base preset → Batch color grading → Selective refinement.
Batch application: sync, copy-paste, and actions
Sync global adjustments across similar shots, then copy-paste local corrections where appropriate. Use batch actions or macros for recurring tasks (keywording, watermarking, export presets) to create workflow automation for photographers.
Quick checklist:
- Sync base settings for camera/lens groups.
- Paste local corrections for problem frames.
- Run actions for resizing/metadata.
Exporting, naming conventions, and delivery formats
Finalize exports with consistent export presets and a predictable naming convention: Client_Event_YYMMDD_###. Prepare two delivery sets: web-sized JPEGs for proofing galleries and high-res TIFF/JPEG for albums or prints. Plan your gallery delivery process for efficient client access and download options.
Quality control checkpoints before delivery
Always run a final QC pass: check focus at 100%, color clipping, crop consistency, and metadata. Verify filenames, embedded color profile, and sample-print a few images if delivering for print. Use client gallery feedback loops in your proofing workflow to catch missed issues and finalize selects.
Finish your batch editing workflow by uploading to your proofing platform and requesting client gallery feedback to close the loop.
Designing a photo proofing workflow that reduces revisions
Design your client-facing proofing so you get clear, actionable feedback the first time and avoid endless edit rounds. A well-built flow ties your culling and batch editing to client decisions, speeding approvals and protecting your time.
Picking a proofing platform: features to prioritize
Choose photo proofing software that makes decisions obvious and simple for clients. Prioritize fast loading galleries and mobile-first design so clients can review anywhere.
Look for these core features:
- Annotations and drawing tools so clients point exactly to what they mean.
- Versioning and history so you track changes without losing earlier notes.
- Approval flags, favorites, and downloadable contact sheets for simple selection.
- Integrations with Lightroom or Zapier for smooth batch color grading and automation.
Gallery structure: organization, variants, and selections
Organize galleries around client decisions, not your folder structure. Create folders like “First Picks,” “Finals,” and “Retouch Requests” so selections stay clear.
Label image variants and keep originals separate so you can revert quickly. Provide a strict selection tool (stars or checkboxes) to capture final sets without email back-and-forth.
Collecting feedback: annotation, versioning, and change requests
Require annotated feedback to remove guesswork. Ask clients to use the platform’s annotation tools rather than vague email notes.
Use versioning to show before/after and accept or reject specific changes. Keep change requests consolidated: one round of edits per image, with a short comment thread to clarify details.
Insist that clients mark edits directly on images and limit feedback to one consolidated round per image — it saves hours and prevents scope creep.
Setting clear revision limits and turnaround expectations
State a firm number of included revisions and the expected turnaround for each round in your contract and gallery. Define what counts as a revision (crop, color tweak, composite) and what triggers an extra fee.
Set realistic SLAs (e.g., 48–72 hours per round) and automate reminders so both you and the client stay on schedule. Clear limits and timelines reduce ambiguity and get galleries delivered faster.
Tools, integrations, and automation to speed the process
Like.photos and how a proofing tool fits into your workflow
A proofing platform like Like.photos becomes the single place clients review, select, and leave feedback, cutting back-and-forth email time. Embed galleries from your culling step and push selects back into your catalog so edits map to client choices. Use the tool to capture client gallery feedback and finalize deliverables without duplicate uploads.
Use a proofing tool as the decision engine: clients mark selects and changes there, then you pull only those files into your editing pipeline—this single step saves hours per wedding.
Lightroom, Capture One, and plugin workflows
Choose the editor that matches your style: Lightroom for fast library-wide adjustments, Capture One for tethered shoots and color control. Use plugins or published services to send selected files directly to and from your proofing tool. Keep your master catalog as the source of truth and sync only client selects back and forth.
Batch scripts, presets, and LUTs for consistent grading
Apply presets or LUTs as the first pass to lock in a consistent look across a job. Save time by creating variant presets (indoor, outdoor, golden hour) and apply them in bulk during culling and batch editing. Test a few representative images, then roll the chosen preset across the set to maintain consistency and speed.
Automations: auto-export, renaming, cloud sync, and delivery
Automate repetitive tasks so your hands stay on the creative work. Use these common automations:
- Auto-export: export client selects at predefined sizes and formats.
- Renaming rules: apply consistent filenames for archiving and delivery.
- Cloud sync: push final folders to your cloud or Like.photos automatically.
- Delivery hooks: trigger gallery emails or download links once export completes.
Link these automations through Lightroom/ Capture One export presets, folder-watching utilities, or a simple script runner. The result: fewer manual steps, fewer mistakes, and a faster gallery delivery process that feels professional to clients.
Templates and sample workflows for weddings, portraits, and families
Wedding workflow: fast cull, highlight edits, and same-day gallery delivery
Start with a fast cull to eliminate repeats and unusable frames within 1–2 hours after the event. Use a star or color system and a quick keyboard-driven pass to reduce 2,500 images to ~300 keepers.
Prioritize same-day highlights: edit 30–50 hero images for a social-ready gallery. Then run batch color grading to keep looks consistent across groups and ceremony photos.
- Rapid cull (keyboard only) — tag top 10%.
- Batch apply session preset and sync.
- Create same-day gallery and send via photo proofing software for quick shares.
- Full edit queue for final gallery delivery.
Deliver a compact same-day highlight gallery first — it builds trust, satisfies clients, and short-circuits revision cycles.
Portrait workflow: session presets, retouch queues, and proof rounds
Start by applying a session preset to all selects so tone and exposure match across poses. You’ll save hours when you batch-adjust white balance and contrast before individual retouching.
Organize a retouch queue: basic corrections in bulk, then targeted skin/eye retouches on client favorites. Use a proofing workflow that invites client gallery feedback to lock final retouch priorities.
- Cull → apply preset → batch tweaks → mark retouch candidates → upload proof gallery.
- Run 1–2 proof rounds to finalize retouch list.
Family session: quick turnarounds, print-ready exports, and client-choice galleries
Start with a quick turnaround promise (24–72 hours) to win referrals and repeat bookings. Cull tightly and deliver a smaller proof gallery that highlights variety: candid, posed, and printable crops.
Automate print-ready exports for common sizes, and create a client-choice gallery that lets families pick prints and digital downloads. Use workflow automation for photographers to tag print crops and generate export presets.
Checklist templates you can implement this week Start with these actionable checkboxes you can copy:
- Fast cull (first pass, 1–2 hrs)
- Apply session preset and batch grade
- Create proof gallery (client selection enabled)
- Collect client feedback and mark retouch queue
- Export final gallery + print-ready files
- Deliver and close gallery in your gallery delivery process
These templates map directly into your proofing workflow and are ready to copy into your project management or like.photos workflows.
Best practices, metrics, and troubleshooting
Key metrics to track: turnaround time, revision rate, acceptance rate
Track three core KPIs to see whether your workflow speeds up delivery and reduces rework. Monitor turnaround time (shoot to first gallery), revision rate (percentage of clients requesting changes), and acceptance rate (clients who approve galleries without extra rounds).
Measure these weekly or per job and compare by client type (weddings vs. portraits) to spot patterns. Aim for steady improvements—small gains in turnaround time often cut costs and increase referrals.
Use simple reports from your proofing software or a spreadsheet to visualize trends. Track:
- Average days to first gallery delivery
- % of sessions with 1+ revision rounds
- % of galleries accepted within client-specified timeframe
Clear examples and a single consistent deliverable style cut revision cycles dramatically: show clients final samples in the gallery and enforce one export preset.
Common mistakes and how to fix them (over-editing, messy exports, poor client UX)
Over-editing wastes time and creates inconsistency; stop by defining one final look and use batch color grading presets for the majority of images. Create a "hero edit" file and apply that preset to the batch, then only touch problem frames individually.
Messy exports create client confusion and rework; fix this with export templates and an export checklist. Always confirm: correct color profile, sizing presets, filename scheme, and watermarking (if used).
- Quick export checklist: color space, resolution, sharpness, naming, destination folder
Poor client UX kills acceptance rates; improve clarity in your proofing workflow with clear instructions, example images, and deadline expectations. Use your photo proofing software to collect structured client gallery feedback (numbered picks, annotated comments) so requests are actionable.
Scaling to a second shooter or assistant: handoffs and naming standards
Standardize handoffs to avoid chaos when you add help—define one ingest folder, one culling approach, and one naming convention. When scaling your batch editing workflow, require assistants to deliver culls and selects with a fixed suffix/prefix and minimal metadata edits.
Use a shared checklist and these naming rules:
- YYYYMMDD_Client_Session_## (raw imports)
- YYYYMMDD_Client_Select_## (final selects)
- YYYYMMDD_Client_Edit_## (edited exports)
Enforce regular syncs and assign ownership for final QA so the gallery delivery process stays smooth as you grow.
For the next step in this workflow, read Lightroom Client Selection Workflow: Find Picks by Filename and AI Photo Editing Workflow: Integrating with Client Proofing Galleries.
Conclusion: Start streamlining your batch editing workflow (with a soft CTA)
Quick 5-step checklist to implement today
Start with this 5-step checklist to cut editing time and speed approvals.
- Cull fast: remove obvious rejects in one pass so your edits focus on winners.
- Flag favorites: let clients give feedback or hearts to reduce revision guessing.
- Apply batch presets: do culling and batch editing with consistent exposure and tone.
- Export smart: create labeled exports that match your delivery naming conventions.
- Automate delivery: push galleries to clients and trigger client approvals notifications.
Speed comes from consistent small decisions: cull early, let clients point to favorites, and automate the handoffs.
Next steps: templates, automation, and team training
Start using templates to make each gallery predictable for you and your clients. Create a delivery template for weddings, portraits, and families so exports, captions, and timelines never vary.
Start small with automation and expand as you trust the process. Automate batch color exports, client notifications, and gallery unlocks to remove manual steps you repeat nightly.
Train your team on a few focused habits: consistent culling rules, one-click batch adjustments, and reading client gallery feedback so everyone edits to the same brief.
Try like.photos to simplify proofing and speed client approvals
Make proofing painless by capturing what clients actually want through favorites and clear filenames. Try like.photos to simplify proofing and speed client approvals — clients tap favorites and you get exact filenames for final edits.